Understanding Color Grading
What is Color Grading
Color grading is a powerful and transformative video editing tool that allows you not only to improve the quality of your video, but to set the mood for your entire production. Achieve cinema-quality color effects, mimicking hollywood films like the Matrix, Inception, and more using color grading controls in Pinnacle Studio and take your video project to the next level.
Color Grading vs Color Correction
Color Grading and Color Correction are two similar terms, occasionally used interchangeably. Generally, color correction refers to adjustments made to a video to improve the quality of your footage. These include corrections made to compensate for issues like underexposed subjects, unnatural skin tones, irregular lighting, and other problems that may have occurred during filming. Color Correction is often the first step in a color grading process, addressing basic challenges with the footage before the full color profile and creative adjustments have been made. Color Grading is a broader term, and while it sometimes includes corrections, it also applies to adjustments that are made for stylistic effect. Changing the color of an object, shifting the hue to set the mood in a scene, and making alterations to keep the tone of video clips consistent across a project are all examples of using color grading.
Explore Color Grading, Video Masking, and more pro-caliber features with Pinnacle Studio
Color Grading with Pinnacle Studio
The current four color grading control panels included in Pinnacle Studio’s color grading toolkit offer similar but unique ways you can adjust the brightness, tone, hue and additional color levels in your video project. These four color grading control panels are listed along the top of the ‘Editor’ window under ‘Color’:
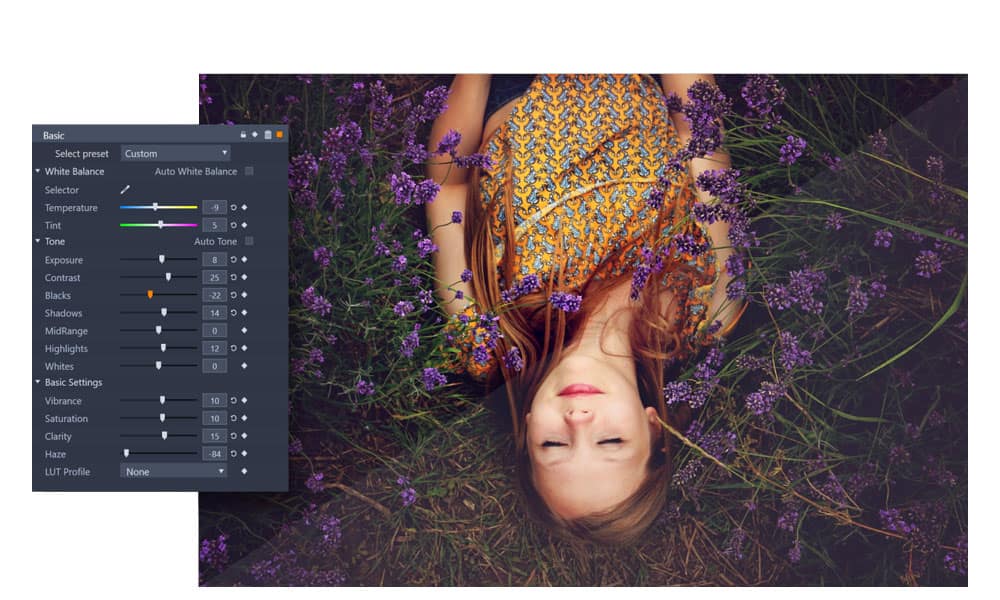

Contains controls for White Balance, Tone, and Basic Settings, allowing you to adjust the temperature, tone, exposure, vibrance and more levels of your video. Also includes a selection of LUT profiles that can be applied to instantly add cinema-grade color grading to your video project.
Contains the interactive tone curve for your video that can be used to increase or decrease the brightness of the shadows, midtones, and highlights in your clip. Adjustments can be made simultaneously across all colors, or individually targeting Red, Green, and Blue.
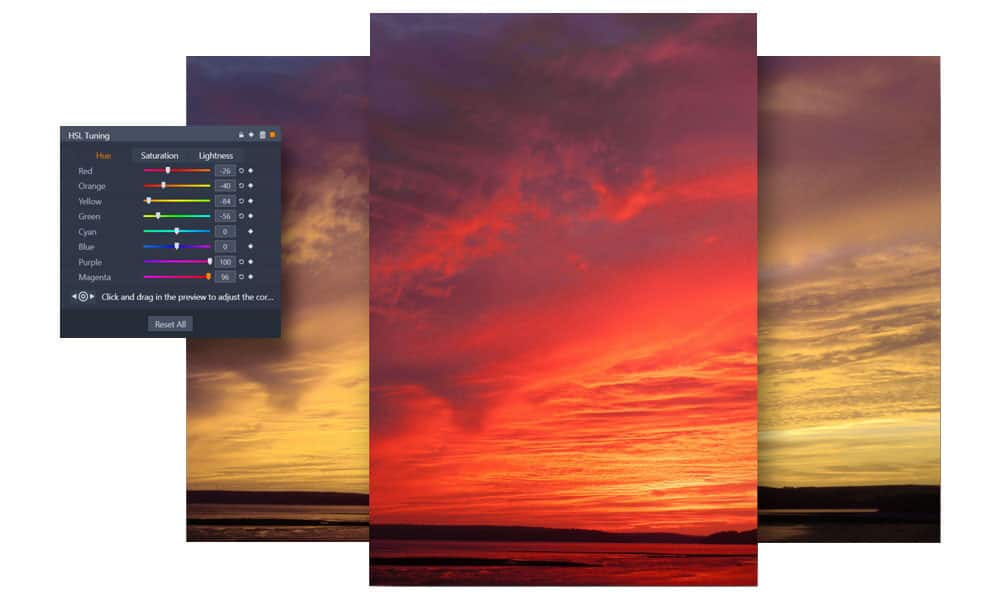
Contains controls for Hue, Saturation, and Lightness, allowing you to shift colors within your image to change, enhance, or fade them. Adjustments can be made using the sliders, or by selecting a color within your frame using the intuitive color shift tool.
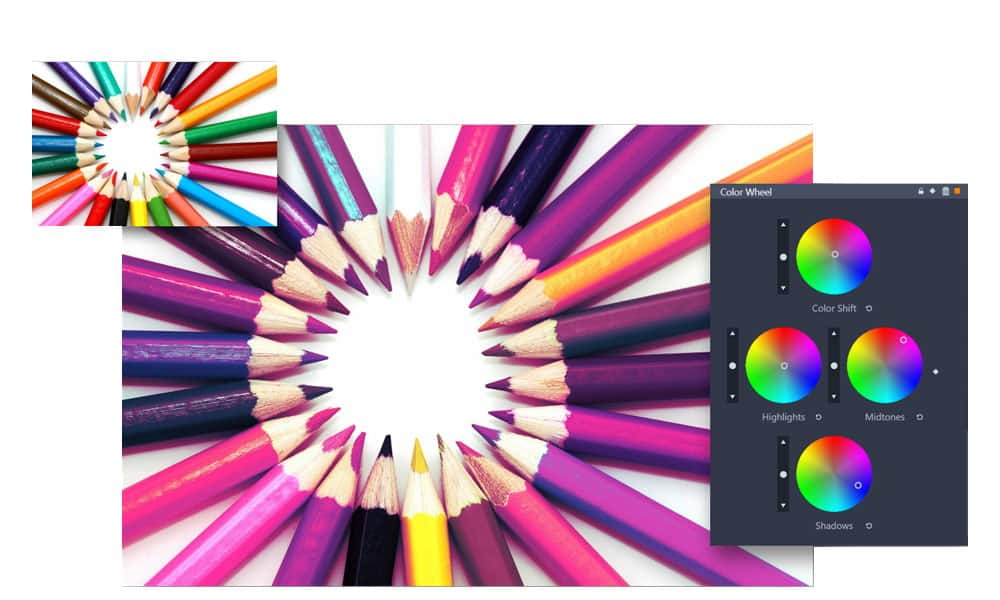
Contains four Color Wheel contols that can be used to transform the color of the highlights, midtones, and shadows in your footage, or to shift the color scheme of your video entirely! You can also adjust the overall intensity of these settings using the sliders on the left of each color wheel.
By default, each of the color grading control panels open with a keyframing window immediately to the right of the settings where you can choose to fine tune your adjustments to evolve over the duration of your clip. You can instead choose to display one of four ‘Video Scopes’ to view additional information about the color in your clip. Each of the following Video Scopes display information about the brightness of colors in your clip in a different way, offering unique uses:

The Waveform scope displays the brightness of the red, green, and blue pixels across your frame from left to right. This scope can be used to determine if a shot is under or overexposed, to ensure levels are within broadcast safe levels, and even to identify prominent colors to make corrections to the color balance and temperature of your footage.
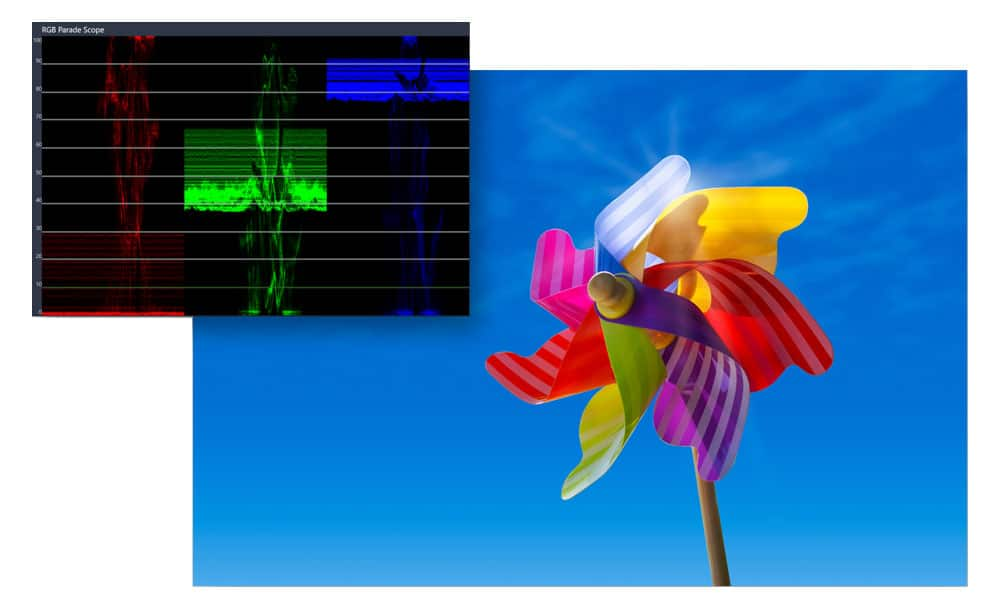
The RGB Parade scope displays the same information as the Waveform scope, but separates the feedback of Red, Green, and Blue and displays them side by side. This is often easier to read than the traditional Waveform scope, making the prominent colors in your footage easier to identify so you can make any necessary color corrections.
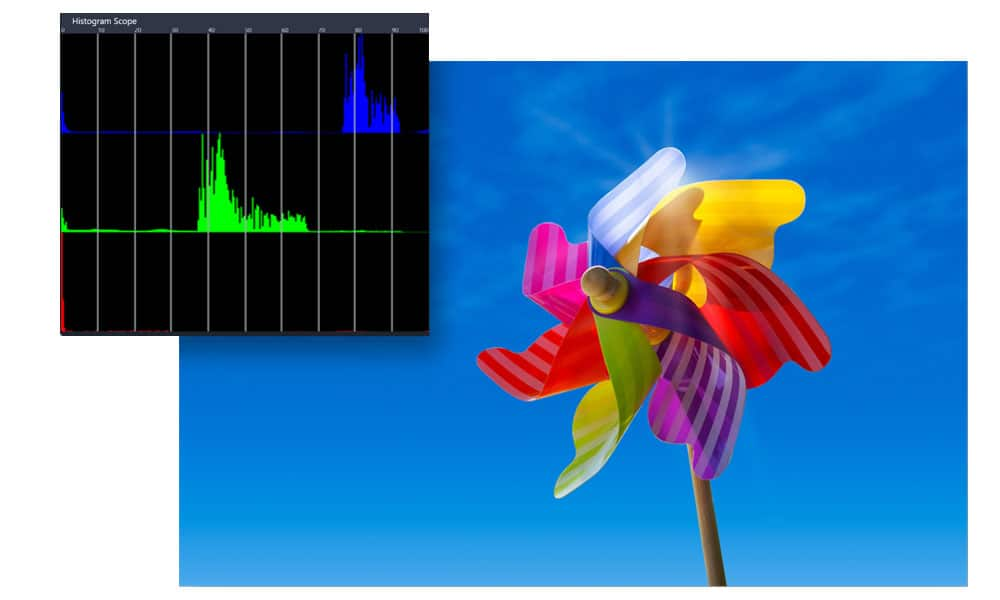
The Histogram scope displays the distribution of pixels for the clip, from dark (shadows) to light (highlights) along the horizontal axis. This scope can be used to evaluating the distribution of pixels for a selected frame in your video to determine if there is a color cast, or to determine if there is enough image data in an underexposed shot to correct the imbalance.
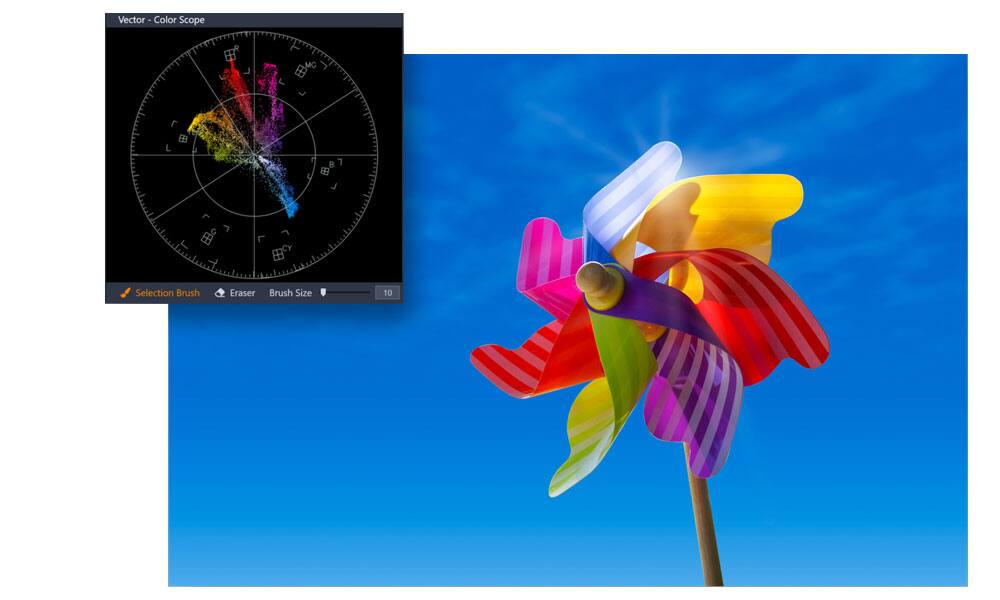
Also called the Selective Vectorscope, this video scope is unique as it features a ‘Skin Tone’ line as an easy point of comparison for the realism of skin tones in your footage, and can be limited to display only certain areas using the Selection Brush tool.
With this toolkit of powerful color grading features, you can not only color correct your footage, but apply cinema grade color grading adjustments to completely transform the tone and mood of your video project. Explore the potential uses for each color grading control panel and learn how to color grade your next production for pro-quality results!
Learn how to correct white balance, adjust the tone of shadows and highlights independently across colors within your video, even instantly change the color scheme of a project using these color grading tools! See an overview of using the color grading controls in Pinnacle Studio in the tutorial below.
Why use Pinnacle Studio to edit your video?
Pinnacle Studio’s powerful collection of tools provide editing precision, and empower you with complete creative control. The color grading adjustments you make to your video project are fully keyframable, giving you the power to fine tune every detail of your edits. Pinnacle Studio also features a growing number of timeline efficiencies to streamline your workflow, including easy duplication of your color grading customizations across clips.
Pinnacle Studio offers pro-quality tools beyond color grading including video masking, 360 video editing, over 1500 visual filters and effects, and more! Take a look at all the features offered by Pinnacle Studio and start editing like a pro today.


